Knowledge Base
AVM Content
- FRITZ!Box 7590 AX
- FRITZ!Box 7590
- FRITZ!Box 7583 VDSL
- FRITZ!Box 7583
- FRITZ!Box 7582
- FRITZ!Box 7581
- FRITZ!Box 7560
- FRITZ!Box 7530 AX
- FRITZ!Box 7530
- FRITZ!Box 7520
- FRITZ!Box 7510
- FRITZ!Box 7490
- FRITZ!Box 7430
- FRITZ!Box 7390
- FRITZ!Box 7369
- FRITZ!Box 7340
- FRITZ!Box 7330
- FRITZ!Box 7272
- FRITZ!Box 6890 LTE
Power LED flashes
The FRITZ!Box's Power LED flashes? ✔ Here you can find out what this means and how to solve the problem.
As soon as you connect your FRITZ!Box to your DSL line, the FRITZ!Box establishes a connection to the DSL provider's exchange. This can take up to 10 minutes. During this time, the Power LED on the FRITZ!Box flashes and then stays lit as soon as the DSL connection has been established.
This guide shows you how to resolve the following errors:
- The FRITZ!Box's Power LED flashes continuously.
- The FRITZ!Box does not establish a DSL connection.
The following error message is displayed in the event log of the FRITZ!Box:
- "DSL not responding (no DSL synchronization)"
Simply proceed as described below. After each measure, check whether the problem is solved.
Note:All instructions on configuration and settings given in this guide refer to the latest FRITZ!OS for the FRITZ!Box.
1 Checking the event log of the FRITZ!Box
- Click "System" in the FRITZ!Box user interface.
- Click "Event Log" in the "System" menu.
- If the message "DSL is available (DSL synchronization exists with [...] kbit/s)" is displayed in addition to the message "DSL not responding", follow the steps in our guide FRITZ!Box reports that the DSL connection drops frequently.
2 Making sure that the DSL line is supported
- Check whether the FRITZ!Box supports your DSL line.
3 Selecting the DSL standard
- Click "Internet" in the FRITZ!Box user interface.
- Click "DSL Information" in the "Internet" menu.
- Click on the "Interference Resistance" ("Line Settings") tab. If the tab is not displayed, enable the Advanced View first.
- In the section "Annex Settings", select whether your FRITZ!Box is connected to a DSL line that uses Annex A or Annex B.
Note:In Germany, Annex B is always used, other countries almost always use Annex A. Contact your DSL provider to find out which standard is used on your DSL line.
- Click "Apply" to save the settings.
4 Resetting the interference resistance
Set the interference resistance for the DSL connection to "maximum performance" since otherwise you will not be able to establish a DSL connection with some DSL lines:
Note:The interference resistance of your DSL connection should only be changed if you occasionally experience problems with the DSL connection.
- Click "Internet" in the FRITZ!Box user interface.
- Click "DSL Information" in the "Internet" menu.
- Click on the "Interference Resistance" ("Line Settings") tab. If the tab is not displayed, enable the Advanced View first.
- Click the "Reset Setting" link.
- Now the interference resistance is automatically set to "maximum performance".
5 Checking the DSL line and cabling with the DSL line test
Performing the DSL line test
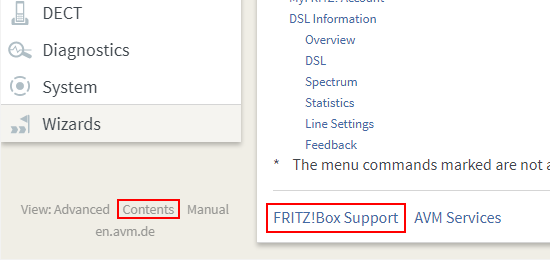
- In the FRITZ!Box user interface, click "Contents" on the bottom left of the page and then "FRITZ!Box Support".
- Click the link "DSL line test".
- Remove the DSL cable from the FRITZ!Box.
- Click the "Calibrate" button and click "OK" to start the calibration.
- Reconnect the DSL cable to the FRITZ!Box once calibration is completed.
- Click the "Measure" button and click "OK" to start the DSL line test.
- Work through the instructions in the section matching your result.
Line test reports: DSL cable defective or not inserted
- Use a different DSL cable (for example, from another DSL modem) to connect the FRITZ!Box to the DSL line.
- If you are using the FRITZ!Box on a DSL line with an additional telephone line (analog or ISDN):
- Remove the DSL/telephone cable from the splitter's DSL socket and from the FRITZ!Box.
- Use the network cable included with delivery to connect the FRITZ!Box to the socket on the DSL splitter labeled "DSL".
- If you are using the FRITZ!Box on a DSL line with an additional telephone line (analog or ISDN):
- If the Power LED lights up constantly after 10 minutes, the DSL cable used before is defective and must be replaced.
-
Note:You can either purchase a new DSL cable from an electronics retailer, or order it from us by sending an email to zubehoer@avm.de. You can also make your own DSL cable using the guide Assignment of cables, adapters, and sockets.
-
Line test reports: Error in on-site wiring
- Remove the DSL splitter if you are using the FRITZ!Box on an IP-based connection.
- Remove all cable extensions, unused cables, telephone jacks, and additional electrical components (for example surge protection, automatic extension outlets).
- Make sure that the FRITZ!Box is correctly connected to your DSL line. For detailed information, refer to the quick guide included with the FRITZ!Box and the manual.
Line test reports: Error with provider
- Either: Test whether a different DSL modem works on your DSL line.
- Or: Test whether the FRITZ!Box can establish a DSL connection on a different DSL line, for example at your neighbor's.
Note:Only connect the FRITZ!Box to the DSL line and the power mains. A DSL connection was established if the Power LED remains lit after no more than 10 minutes.
- Or: Test whether the FRITZ!Box can establish a DSL connection on a different DSL line, for example at your neighbor's.
- If another modem also does not work on your line, or if your FRITZ!Box can establish a DSL connection on a different line, there is a problem with your DSL line. Contact your DSL provider and have them check your DSL line.
ATTENTION!You may be charged for checking. Ask your provider about charges in advance!
6 Using a different DSL version
The DSL version of the FRITZ!Box undergoes constant development with each FRITZ!OS to ensure that it can establish optimal DSL connections under all circumstances. In individual cases (for example on DSL lines with outdated DSLAMs) the FRITZ!Box may only be able to establish a DSL connection with certain DSL versions. Therefore, test the current and the previous DSL version:
Using the latest FRITZ!OS
The DSL version is part of FRITZ!OS. Make sure that the FRITZ!Box is using the latest FRITZ!OS and therefore the latest DSL version:
Using the previous DSL version
If the problem occurs with the latest DSL version (for example after updating FRITZ!OS), test the DSL version of the previous FRITZ!OS:
- Click "Internet" in the FRITZ!Box user interface.
- Click "DSL Information" in the "Internet" menu.
- Click on the "Interference Resistance" ("Line Settings") tab. If the tab is not displayed, enable the Advanced View first.
- Enable the option "Use previous DSL version".
- Click "Apply" to save the settings.
Now the previous DSL version is enabled and the FRITZ!Box is restarted. The restart will take about two minutes.
 Deutschland
 International (English)
 België (Nederlands)
 Luxemburg (Deutsch)